Today I am going to talk about a task I did in class and the follow up. The activity I am talking about is a fish bowl task. What is it actually? Well, I had a seminar class, so I put my students in groups of four. They were the students taking part in the seminar. Then I had four students observe them and give them feedback. These students sat next to or were standing behind the students who were taking part in the seminar. So, imagine an inner circle (seminar participants) and outer circle (seminar observers).
Now, time for some context. My students are international students (Asian) who are in their fifth week of an EAP course. They are all intermediate/ upper intermediate students. This is their first time studying in the UK. They have taken part a few seminars before and they have self assessed and given peer feedback a couple of times. They are not very experienced at giving feedback.
The fact that their English is a bit weak and they are not very experienced at giving feedback affected the activity. In what way you may ask? Well, instead of asking them to give a lot of feedback, I focused on two aspects of the seminar. I asked them to look at the course’s assessment criteria, but only focus on the column that was about interaction. I need to mention here that I went through the criteria with them and made them more student friendly (simplified the language and used emoticons!).So, that was one thing.
The second thing I asked the assessors to comment on was the use of set phrases for taking turns and interrupting. These were part of the lesson as well. I printed out some useful phrases and asked the assessors to tick the phrases their classmates used.
The Task
The seminar participants took part in the seminar. The assessors listened quietly and gave feedback. Then the students swapped roles.
After the seminar
Students sat next to each other and gave each other feedback. They told each other what they did well and what they needed to work on.
When the whole activity ended, I asked my students to tell me what they thought about this task (I used a Google classroom comment thread).
What they said
Most students enjoyed the activity. They felt that their classmates gave them good feedback. They enjoyed the role swap and that they were not asked to give a ton of feedback.
There were a few comments about feeling shy and embarrassed, but those students did say that this was not a big problem because in the end they did find the task helpful.
Practical stuff
I printed out the helpful phrases check list.
The student friendly rubric was on the board and students had to take notes.
As for timing, this whole activity took about 40 minutes. The feedback part was an extra 10 minutes. I asked them to spend 5 minutes on student A and then five minutes on student B. That meant that each member of the pair got 5 minutes worth of feedback. The whole activity lasted for 50 minutes.
Will I try this again? Yes. My students really enjoyed it and I found it very helpful. have you done something similar? let me know in the comments below.
Today’s post is all over da place… but goooooooooood (me thinks). I am sharing with you a few things I used in class, plan on using in class, and some things some of my Facebook friends shared with me!! So, let’s share folks!
I was teaching question tags and I came across My English Page website and it is pretty good. You can get the question tag lesson material (theory) here and exercises here. I would not use this for weak students or lower level learners. I’d say it is better for A2+. I usually go to the Grammar Bank website when I am looking for theory + exercises (online), but I thought I’d try this one a try as well.
My learner asked me to find videos/material that would help him familiarise himself with the Aussie accent. I grew up in Sydney but only have an Oz twang as I have been told and my accent is not as Aussie as it used to. So, anyway, I asked my Facebook teacher friends for help and many made suggestions, so I am sharing these suggestions here as well (thanks to everyone!!).
Katherine suggested I checked out Elllo. I had never heard about this website. I just had a quick look and there are various videos with different accents (from all over the world) and listening questions (plus the transcript of whatever the person in the video says). There are even EAP videos (yup) Interesting!!! You should check it out.
I discovered ABC News Australia. Videos that last for 90 secs. You can find them here.
I used this article again in class and had forgotten how good it is to get students talking. I have two words for you. Language Police. You can read the article here and use it in class as you wish.
Harvard Business Review Podcasts: I am going to use this podcast in a lesson later on (if I make a lesson plan, I will share it here). The podcast about productivity is worth listening to though, especially with your Business English students/ higher level learners (lawyers/ CEOs etc.). I love the part about reading and the flashlight/ naps.
Quick fun game (saw this in a planner group).
Tell your students:
So,you have $10.000 but you can only buy things that start with the first letter of your name. What do you get???
My answer: I’d get jumpers, jugs, jelly beans- jelly babies, juice, Jo Malone perfumes, a jigsaw puzzle (not sure about that one), Japanese beauty products (that’s cheating) : Dunno what else….
But, how can you make this part of a lesson? Well, you can do this when teaching nouns, or as a speaking task before teaching story telling. It could be part of a lesson where you teach reasons or the use of because.
Something random
(coz everything else mentioned so far is connected :p)
Lettering is a ‘thing’ and I am trying to improve my lettering skills. I found some pdf files on some websites and if you want to try lettering with your students or improve your own calligraphy skills, you should check out this website.
So, that’s all for now guys. If you have found anything worth sharing, do let me know in the comments section below. By the way, I often wonder what you think when you read my posts, I mean, I am so informal!! But I am me and I am talking to you guys like I would if we were in the office, sharing ideas. OK. I am off now!!
Till next time……
P.S. EAP pre- sessional tutor posts have started to get advertised on Baleap and indeed.org.uk. You should check them out and you can also read my tips regarding pre-sessional EAP courses/ interviews and so on.
Hey, I missed you guys. Haven’t written a (kinda) proper post in ages!!!This is actually my 200th post!!! Thanks for being here xx ❤ ❤ ❤
Today I had a lesson with a learner and I had planned to do a lesson on phrasal verbs. I had my lesson plan ready (not really a plan, just a few ideas on what I would do and when), my presentation uploaded (this was an online class) and everything was set. The phrasal verb lesson was quite challenging and my learner did want to be challenged, so I was really pleased with what I had prepared for today.
My lesson started and I did a bit of chit chat. My learner said,
I am working from home because I get distracted at work.
and bam…. my lesson plan went down the drain, and I just changed everything!! You see, this phrase got us talking about distractions and working from home.Penny dropping.
I then decided that THIS was the chance to change the lesson into something that was prompted by the learner and something that made her very chatty. So, scratch the grammar lesson, we are gonna do a speaking/ listening class.
What did I do?
I found the Jason Fried TED talk about ‘Why Work Doesn’t happen at Work’ and asked her questions that were actually answered in the TED talk.
I asked,
Where do you go to get important things done?
What is the connection between work & sleep? She actually got this right!! It is phase based.
What distractions do you have at work? Can you categorise them in real and not important distractions?
We spent about 10 minutes talking about those questions.
I then asked her to take notes of the answers Fried gave to those questions.
Because the TED talk was long (15 mins), I broke it down into 2 halves. Half way through, we discussed her answers to the questions and issues that came up from what she heard. We then heard the rest of the talk and did the same.
So,we talked about what the learner already knew, what she learnt from the talk, and what she wanted to learn from what she heard. This talk actually inspired her to do some research on meetings, managers differences between the USA and France, and Jason Fried!
Did I just have a learner driven lesson?
I think I did. Yes, I prompted her and gave her a provocative TED talk as stimulus. I have never had this learner be so chatty before! She loved it because she is a manager and she could relate to what was being discussed. She actually asked for the link to the TED talk cause she wanted to use it during a meeting.
Me, to myself.
YES!
Did I meet my learning objective?
Well, we did not do anything about phrasal verbs, and if my objectives were to
*familiarise learner with phrasal verbs of verbs XYZ and blah, blah, blah,
then, we didn’t, but this spontaneous 5 minute planned lesson was one of the best we have had and she loved it. I am glad the penny dropped when it did, and that I was actually ‘listening’ to my pre-lesson chit chat.
Joanna’s words of wisdom
Do not underestimate the power of chit chat.
Listen to the ‘chit chat’.
Use it to guide you in your choice of material.
It’s OK to chuck out the lesson plan and be spontaneous.
Oh! But do keep in mind that I do have a lesson plan for the Jason Fried TED talk (which I have shared here) and I have used it many times, so while the ‘chucking out’ was spontaneous, I did know what I was doing and talking about. I knew my material very well. I just hadn’t prepared it for today.
So, folks that was my lesson today.I am a Happy Teacher today!
Do you guys have similar experiences? Let me know when you chucked out your LP and did something completely different. How was it?
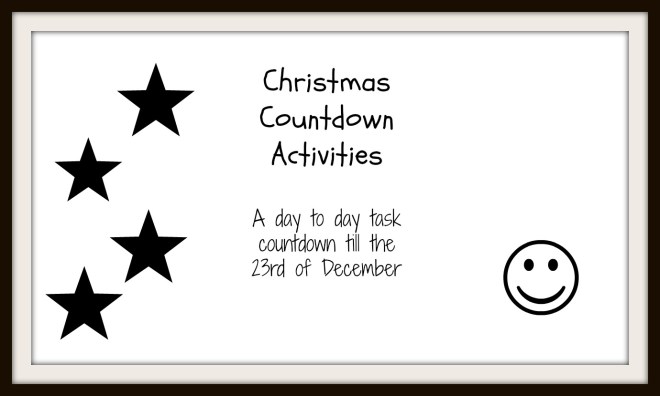
For the 3rd year, I have prepared a day-to-day activity calendar/ countdown up to the Christmas break. There are loads of shorter and longer tasks you can try with your learners. If you do not like all the tasks, I have added some extras at the end of this post. I hope you like my suggestions!!
Possible preparation before the tasks start:
Depending on your budget, you may need to ask students to contribute.
You may need to order blank Christmas stockings. You can find a 6 pack on Amazon here.
Ask your students to bring in small stocking fillers/ pressies, so you can use them in the pass the parcel game. You can set a price limit.
Buy chocolates for various activities (if you have the budget)
Thursday 1
Decorate the classroom part 1
Ideas:
Decorate the Christmas tree.
Print Holiday Season colouring pages and hang on the wall
Friday 2
Decorate the classroom part 2
Gingerbread Streamers
Christmas gingerbread men streamers. Get a string of paper and get each student to draw a gingerbread man. Then cut out the men and make a hole on the top of the paper and hang it in the class.
Educational twist: teach your students the parts of the body while making the streamers.
Monday 5
Set up the secret Santa game/ activity.Explain what secret Santa is. Put all your students’ names in a bag and then each student pulls a name. Make sure there is a money limit or that everyone is making a gift instead of buying something (that’s up to you to decide).Also specify that the presents need to be gender neutral! Tell them they must bring in their presents on X of December (give yourself time to make or purchase something if a student has forgotten to bring a purchase).
Tuesday 6
Christmas/holidays around the world project: Get your students to find information about how Christmas is celebrated around the world. It may be a good idea to do some research on how people in Australia celebrate cause it is summer over there :). Give your students about ten days to finish their projects. Inform them that they will be presenting to the rest of the class. Depending on class size, you can do this as individual/pair or group work. You can also send your learners to this website and ask them to find information. Presentation date: Friday the 16th
Wednesday 7
Holiday ABCs
Make teams and give students pieces of paper with different letters of the ABC. Each team must come up with words that have to do with the holiday season and that of curse start with the letter they have on their card.
Thursday 8
Time for some Christmas songs/ carols. Find a Christmas song you like, search for the lyrics and start singing with your students. My suggestion: Santa Claus is coming to town
Yu could also do a Christmas karaoke. This video has 15 songs without words just the lyrics and the music.
Friday 9
Online Christmas trivia: Get your learners to answer questions about the holidays.This can be done online in pairs or groups. You can find the quiz here.
Monday 12
Describe the object/picture:Depending on the class size make groups of 3 or more.. Give one student a Holiday related picture. The other group members cannot see the picture. The student with the picture describes the object and the other group members draw what the student is describing. Once the description is finished the students see how close to the drawing they are. This can also be done with a Holiday ornament where the student describes the ornament and the other learners draw it.
Tuesday 13
Time to watch some movies.
Christmas movies for kids
The Polar Express
Home Alone
Frosty the Snowman
Miracle on 34th Street
The Muppet Christmas Carol
It is a wonderful life
For teenagers/ adult learners that like romance ❤ ❤
You can watch Hallmark Christmas movies. A lot are available online. Just press Hallmark Christmas movies on YouTube and you will find lots of full movies online.
If you do not want to watch something for a full lesson, you can watch the Charlie Brown clip below (7 minutes long)
Educational twist: Get your students to write a film review or summarise the main points of the story.
Wednesday 14
Make a Christmas Stocking. Ask your students to bring in a blank Christmas stocking. Use different materials to cut out ornaments/ designs that they will stick on their stockings
Thursday 15
Pass the parcel Holiday edition. You wrap chocolates or little gifts in lots of layers of paper. You make a few ‘parcels’.You give the parcel to the learners who are sitting in a circle. While the music is playing they need to be handing each other the parcel’. You, the teacher, stop the music suddenly and the student who is holding the parcel needs to take off the wrap.
Educational twist:
When the music stops in order for the student to unwrap the parcel, you can ask a grammar/ vocabulary question. If they get it right, the take the wrap off, if they get it wrong, they don’t take it off..
Friday 16
Present the ‘Holidays around the world’ project set on the 6th of December.
Monday 19
Sock Snowman: Get your students to make a snowman out of a sock. You can watch the video with your learners and make a sock.
Educational twist: Get them to write down the instructions on how to make this. Half the class watches the video and then they have to tell their classmates (the other half) what to do. If you are interested in grammar, get them to practice countable and uncountable nouns.
Tuesday 20
Stocking filler exercise. I have written a blog post about this task. You can find it here.
Wednesday 21
Pin Rudolph’s red nose. How do you play? Find a picture of Rudolph online, blindfold your students, turn them round in circles for a bit, and then ask them to pin Rudolph’s nose. This activity is loads of fun and young learners really like it.
Thursday 22
Christmas Scavengers Hunt/ Treasure hunt.
Place clues around the class/ school that will lead to a ‘treasure’ (maybe a chocolate/ cake, so that it can be shared). Depending on your class size you can organise more than one treasure hunts.
Friday 23
Party time/ Secret Santa.
Need more ideas? Try these extras.
Go to audible.com and use the free trial option to listen to Charles Dickens audiobook (it is 2hrs 54 mins long). This is appropriate for higher-level learners.
More Christmas DIY ideas video (it’s got some Itlian words, but you get the idea from watching the video 🙂 )
Play Christmas word snake. How is this played? Each student takes turns to write a word connected to holiday season on the board. The final letter of student A’s word is the first letter of student B’s word.
Christmas
Santa
Angel
Lantern
Time to make a card for the Holidays! You can find templates here or improvise!!
Play Holiday season Bingo (make word or picture Bingo cards). You can find templates here.
Picture from DLTK website (linked above)
I hope you enjoyed this post. Don’t forget to follow my blog and other social media.
I was watching a movie the other night and I got an idea for a Christmas activity. You need Christmas stockings and stocking fillers which are all brought into the class from your students. I think this will be great fun, so let’s have a look at the procedure, the learning objectives and my suggestions on how this activity should go.
What do you need?
Students 🙂
Stockings
Stocking fillers
Example of the procedure
Students bring the stocking from home and they fill their stockings with items that are important to them. They give the stocking to the teacher in private so that the other classmates do not see the stocking. The teacher hangs the stockings in the classroom and asks the students to pick a stocking.
Student A has put different stocking fillers in his stocking, for example, a plane ticket. Student B, who has picked student’s A stocking, takes out all the stocking fillers.
Student B then starts guessing the significance of the item. For instance,”I see a plane ticket.I think this student has travelled abroad.” After student B describes all the objects in the stocking, the whole class guesses who the stocking belongs to. No one is allowed to say if it their stocking or not. After all the stockings/ stocking fillers have been described and all the ‘guesses’ have been made, the students say which stocking was theirs and the real meaning of the items in their stocking.
Teacher instructions
Tell sts to bring stocking from home.
Each stocking must have 4 things in it.
Emphasise that they should not show/ tell any other classmates what their stocking or stocking fillers look like.
Inform learners that this is not a gift exchange. All items will be returned to original owner.
The stocking fillers must have a special significance for the student. The items should not be too obvious, so that other learners can have fun guessing what these items mean and why they are important.
Timing
Each student needs to describe the object they take out of the stocking and discuss its significance for at least 2 minutes.
Depending on the size of the class, you allot the time.
Skills practiced
Listening/ Speaking.
Students use vocabulary and grammar related to guessing and hypothesising.
Feedback?
This can be a great learning opportunity. as the teacher is mostly monitoring, they can take notes of any errors made during the guessing or stocking filler description and then the whole class can correct these mistakes.
I think this will be a fun activity and everyone can take part. No money needs to be spent because students bring in items that belong to them.
Let me know if you try this game. Don’t forget to follow my blog (check the sidebar) or give my Facebook page a ‘like’ so that you don’t miss out any super duper posts.
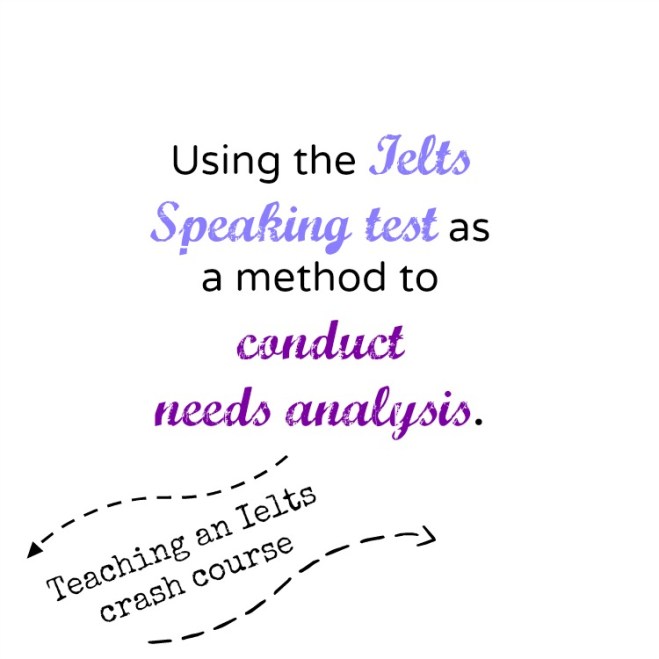
I had an Ielts class with a new learner and I decided to start with a speaking session. I thought this would give me a better picture of my learner’s level and a first idea of what I needed to focus on when choosing material.
What I already knew about my learner
Adult, engineer, post graduate level learner who wants to do an MA in the UK. He already had a B2 level language proficeincy certificate and used his English occasionally.
The day of the lesson came.
After a bit of small talk,
How are you? (that’s the end of the small talk)
I then took out the Ielts Practice Tests book and went to a speaking test. Of course, my first lesson was not going to be a mock test, but I did want to use ‘authentic’ exam questions.
Why?
I wanted:
to give the learner an idea of the speaking questions (topics, level and activities).This is going to be a crash course (intensive course?). We started this week and the learner will be taking the test in March. I needed to know the weaknesses asap, and I thought a speaking sessions would allow me to do that. This was going to be my productive skill needs analysis session.
I also wanted:
to have a communicative lesson (because they are more fun) + a lesson that focused on a productive skill..
to focus on a skill that is a bit more relaxed compared to the others.
The lesson: some thoughts and reflections.
I found a speaking test about being famous. In my mind, talking about being famous yourself, and other people who are famous, is probably a topic everyone can talk about because famous can be defined in so many ways. We also live in a day and age where being famous is not that hard.
Task 1: Ice Breaker/ Intro Questions
I started off with the first part of the Ielts test which is the ice breaker. Talk about your self, your friends, neighbourhood, life / work.
This actually was a good task cause I got to know my learner much better.
I did not stop him or time his answers, I went with the flow. I did not make error correction either. unless it was something major that impeded communication. Instead I lifted up my notebook and took notes. I said to my learner that I would jot down good points and corrections.
I noticed my student was making pronunciation mistakes and grammar mistakes, so I made that the focus of my notes. My needs analysis speaking lesson was in progress.
After we finished the 1st part, we talked a bit about his mistakes. He took notes, and wherever possible he corrected the mistakes he made. If he couldn’t find the correct answer, I told him.
Part 2 The Card
I then gave him a card with questions (this is the 2nd part of the Ielts oral exam). I told my learner he could think as long as he wanted to, take notes and then tell me the answer to these questions.
Again, I took notes, then at the end, we corrected mistakes, discussed issues.
Part 3: Open ended questions
This part was tricky because it required:
Longer turns/ monologues.
Critical thinking.
Digging deeper into the question and elaborating.
My learner had difficulty answering longer/ open ended questions, so I gave him an example and told him how I would answer a question like that. He then did answer the questions. This part showed me that when asked more complex questions my learner struggled, so now I had info about pronunciation, grammar and expressing opinions/ holding monologues/ longer turns.
On the downside
My learner did look at me while I was writing, so while I did tell him that I was taking notes of good/ things and weaknesses, he wasn’t really convinced and there were times when he asked,
What are you writing now?
There were others where he felt a bit discouraged by the questions, so I did stray off the original exam type questions.I do not think that is a downside though (just to be clear). There was a lot of brainstorming and scaffolding in the last part.
In fact, the last part of my lesson allowed me to see how easy it is for my learner to come up with ideas and organise thoughts.
So, by the end of my one hour course, I had a first impression of what my learner needs help with. I have already made a list of some of the grammar points that need to be addressed in future classes as well as ‘sounds’ my student needs help with. By the end of this first lesson, my learner was also aware of what the Ielts speaking part is about.
All in all, I was happy with this type of ‘needs analysis’ speaking session. It was very hands on, dealt with ‘real language problems’. As this is a crash course, I really need to be very focused and have clear objectives. I always think that my 1st lessons are flops, a lot of let’s meet and become friends vibe and this was
Let’s meet, become friends and get down to business.
That’s all folks.
Don’t forget to follow my blog. Give my Facebook page a ‘like’ so you don’t miss out on my super duper posts.
Today’s post is a video. It is my Iatefl (Birmingham) presentation.Un fortunately, I was unable to go to Iatefl, so I thought I’d make a voiceover video. My talk is about using drawings when teaching academic writing.
Before watching please keep in mind:
My presentaion was part of the forum on academic writing and it needed to be 15 mnutes long.
My abstract stated that I was going to also talk a bit about presentations and how to use drawings there, but I decided to only briefly touch upon that as this forum was about academic writing.
Even if you do not teach academic writing, you can still use some of these drawings in your classroom.
I was nervous!
So, I hope enjoy the video and feel free to leave a question, comment in the comments section below.
I am back with another monthly favourites. I am sharing with you websites, videos, articles and loads of random stuff you can use in your classroom. I am kinda happy with this one cause there are lots of interesting things here today.
Shout Out to Bloggers
I discovered a new blog that I like (technically she discovered me), so you may want to check her posts out. It’s called the ELT Think Tank. The post I am sharing with you today is How to get most out of Socrative in the Classroom.
Tekhnologic and I worked on a colour blind friendly post. The focus was on colourblind friendly graphs. You can find it here.
The NY Times website has loads of videos you can watch and create lessons. I created a lesson based on the McDonald’s coffee case (you can find it here) but there are loads of other websites you can check out here.
Harvard Business Review
There are loads of short videos to watch with your learners. I have used this one:
You know I like my DIY and well, I watched this video and loved the idea. You can make (scrunched up/crumpled) paper flowers. Press here to watch the tutorial.
Fonts
Free calligraphy fonts which you can use for your blogging, lesson material or to practice calligraphy with your students (just an idea). Tip: you download the font and then you open the file you have downloaded. You press True Type Font File and then install. It gets added to your Word.
Work
Looking for a summer job (EAP and others)? These are my favourite websites for job hunting:
I had a great moment this month as I got two of my blog posts published in the Huffington Post. You can check them out here and here.
Finally, this is not a favourite for March, but I am really looking forward to this. I am going to be presenting at the Iatefl Birmingham conference. I will be part of the forum on academic writing and will be talking about drawing in EAP. If you are there, do come and say ‘Hello’. My talk is on Thursday the 14th at 10:25.
So, that’s all for now. Don’t forget to follow my blog if you are not already and give my Facebook page a thumbs up so that you do not miss notifications! You can follow me on Twitter/Pinterest/Instagram. If you want to read my beauty/TV and random favourites, check out blog number 2.
Thanks for stopping by. If you have a favourite you would like to share, feel free to leave a comment in the section below. Sharing is caring.
A while back I asked Tekhnologic if he could help with graphs that are more appropriate for colourblind people. We sent lots of mails back and forth and this is what that collab resulted in. I really appreciate the help and I hope you find this post helpful, not only if you have colourblind students, but also if you teach presentation skills and want to show your students a different type of presentation. I am reposting Tekhnologic’s post (our collaboration).
Repost
Back in January, Joanna Malefaki from My ELT Rambles asked me if there was a way to customize charts so that they were more color blind friendly.
She wanted to create charts that weren’t just based on color. She wanted to incorporate lines, dots and patterns. So, Joanna and I ended up collaborating for some time; emailing drafts back and forth and designing some examples.
That collaboration eventually resulted in this post.
Joanna has written an introduction that explains a little bit about color blindness before I continue by discussing the examples and tutorial videos.
An introduction into using images rather than colors for pie charts. Images not only clearly illustrate information but they also make your charts more visually appealing.
Seeing just black and white is extremely rare. Most people are red/green colour blind and more rarely blue. This does not mean that people confuse their reds and greens, it actually means that they have trouble seeing shades of these colors and colors that are formed with these colours.
I am color blind and reading charts is very difficult for me.
I am color blind and reading charts is very difficult for me. Very often people create graphs that use a lot of colours to display whatever they want to showcase. When I told tekhnologic I would like some help with graphs, he decided to help me out with these excellent tutorials on how to make color blind friendly charts.
I gave him some suggestions as to what to avoid. I asked him to:
Use a white background and dark fonts.
Not choose colours that are hard for colour blind people to distinguish.
Try to find different icons or anything else that could be used to show the results of a survey, research or whatever else a chart is used for.
These tutorials are what he came up with and I think they are extremely helpful not just for people who are color blind, but also for people who would like to make their presentations more memorable!
Joanna
You may also want to watch this video from colorblindawareness.org. It’s part of their #1ineveryclassroom campaign and it’s been made to help people understand the difficulties faced by color blind students. Although it is more for teachers of young leaners, I think it is worth watching regardless of the age group you teach.
And as the song says:
Give a helping hand and be understanding of my point of view.
#2 Line Charts
When you insert a line chart into a presentation or document, the default setting is to differentiate the lines by color only.
However, as you can see in the example above, I have attempted to make the chart easier to read by using different line styles with symbols to explain the information. Instead of simply referring to the yellow line, why not talk about the yellow dotted line or the yellow dotted line that illustrates a gradual increase in reading?
Creating a Line Chart
Go to the insert ribbon and click on add a chart.
Choose line chart from the list on the right-hand side and select your style before clicking OK.
Enter your values for the chart.
Enter values from a text or sources.
Or generate a random chart by typing in the following formula: =RANDBETWEEN(1,100). Copy this formula into the other cells and you will generate a completely random chart using random numbers.
Change the chart by pressing F9 – this will recalculate the formula and generate new random numbers.
Don’t choose colours that are hard for colour blind people to distinguish.
This was one of the requests from Joanna. She wanted contrasting colors and different line styles to make the lines easy to distinguish. So, we need to format the lines.
Formatting the Lines
Select one of the lines and go to the format ribbon.
Select the line color menu(shape outline menu) and choose your line color.
Return to the line menu and choose a line style.
You will see five icons under the color selection. Choosing a custom color, the eyedropper tool, width options, line style options and arrows. Line style options is the second from the bottom.
The other way to format the lines is to open the format pane.
Select one of the lines and right-click. Click on format data series.
The format pane will open. Click on the fill line icon.
There are two sections. The line section and the marker section.
The line section allows you to change the color, transparency, width, number of lines and line style.
The marker section allows you to create a marker and change its color, size and shape. Markers represent the data points in the line.
It’s such a quick and simple trick to change the line style, but it can really make a difference and make it so much easier to distinguish the different lines.
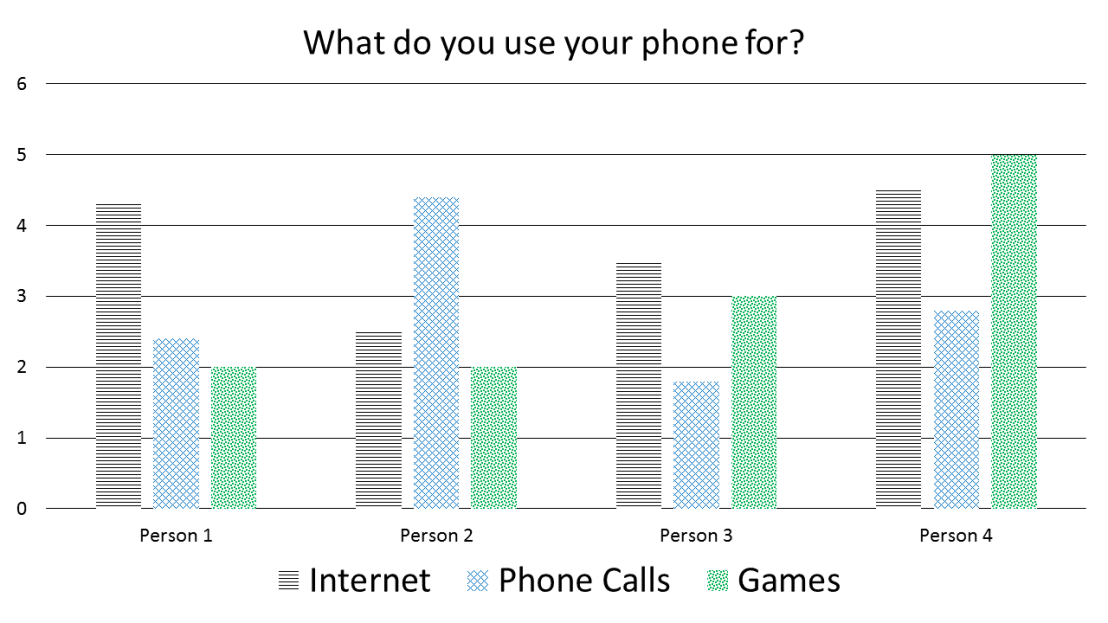
#3 Bar Charts
In the same way we can use line style to help differentiate colors, why not use patterns with other charts.
In the example above, I have attempted to make the chart easier to read by using colors that are easier to distinguish and different pattern fills. I also increased the size of the legend, so it is easier to read the text, but it also easier to see and match the patterns. Instead of simply referring to the black bar, why not talk about the striped black bar or the striped black bar that illustrates Person 1’s internet use?
Creating a Bar Chart
Go to the insert ribbon and click on add a chart.
Choose bar chart from the list on the right-hand side and select your style before clicking OK.
Enter your values for the chart.
Enter values from a text or sources.
Or generate a random chart by typing in the following formula: =RANDBETWEEN(0,10). Copy this formula into the other cells and you will generate a completely random chart using random numbers.
Change the chart by pressing F9 – this will recalculate the formula and generate new random numbers.
Use a white background and dark fonts.
This wasn’t only important for the text, but Joanna also pointed out that it was important for the pattern fill. I had originally used a darker background in the pattern fill, but it made it more difficult to distinguish the shapes.
Formatting the Bars
Select one of the bars and all the whole group of bars should be selected. Click again and you will select only ne bar in that group.
Right-click and click on format data series.
The format pane will open. Click on the fill line icon.
Select pattern fill from the fill options.
Choose a light background color and a dark foreground color.
Select your pattern from the options available.
Repeat for the other bars.
Use contrasting colors and a different pattern for each bar.
Similarly with line styles, a pattern just makes it easier to distinguish different elements of the chart.
#4 Pie Charts
You could use pattern fill with pie charts as well, but using images can make attractive charts that are easy to understand.
In the example above, I have used a different image for each segment of the pie chart and I also increased the size of the legend, so it is easier to read the text, but it also easier to see and match the images.
Creating a Pie Chart
Go to the insert ribbon and click on add a chart.
Choose pie chart from the list on the right-hand side and select your style before clicking OK.
Enter your values for the chart.
Enter values from a text or sources.
Or generate a random chart by typing in the following formula: =(RAND()+RANDBETWEEN(0,25)).
=RAND() generates a random decimal number between 0 and 1.
=RANDBETWEEN(0,25) generates a random number between 0 and 25. Adding both those formulas together will give you a random number between 0 – 25 to at least 7 decimal places. (up to 25.9999999)
Copy this formula into the other cells and you will generate a completely random chart using random numbers.
In the last cell write the formula =100-Sum(B2:B4). This will calculate the remainder out of 100.
Change the chart by pressing F9 – this will recalculate the formula and generate new random numbers.
Try to find different icons or anything else that could be used to show the results of a survey, research or whatever else a chart is used for.
This was another request by Joanna. I used icons and symbols in the line chart example, but you can equally use images. ELTpics has a huge selection of images that can be used to make your charts look both attractive and informative.
Formatting the Segments of the Pie Chart
Click once to select the whole pie chart, click again to select a single segment of the pie chart. Only one part of the pie chart will be surrounded by blue dots.
Right-click and select format data point.
The format pane will open. Click on the fill line icon.
Select picture or texture fill from the fill options.
Click on file.
Select your image and click on insert.
Repeat for the other segments.
Because images contain a variety of different colors, patterns and textures they make it very easy to distinguish different parts of a chart.
I hope these tutorials are of some use and just remember the advice Joanna gave to me. Use white backgrounds, choose your colors well, use images and symbols and format your charts so you don’t only rely on color to read them.
Charts can be inserted into most Microsoft® Office® products. For more help, visit https://support.office.com/
Tekhnologic made some video tutorials for each of these graphs and you can find them on his blog. Press here. He will be doing a follow up, so stay tuned and make sure you follow his blog cause he writes excellent posts.
Back to me:Some final thoughts
I have written about colourblindness so many times. I am trying to raise awareness. Being colourblind is not just about not being able to coordinate your clothes!It is so much more. As teachers, you really need to consider your learners’ needs and if there is a colourblind student inyour class having knowledge is the best way to go.
Thanks for stopping by! Oh! Don’t forget to follow my blog if you aren’t already.
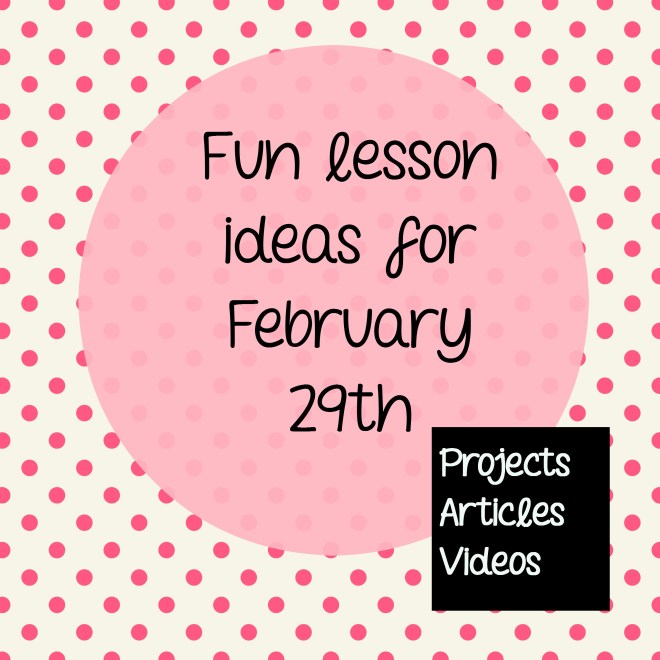
There are a lot of videos on Youtube about the 29th of February or explaining the leap year. I chose this one cause it is clear and quite easy to understand (B1+)
A video explaining the leap year
Apart from reading, talking or watching a video about the leap year or February 29th, you could also get your students to write an essay or a letter to themselves (this does not require watching or reading anything about February 29th)
Ideas for writing
Write an essay about what you would like to have achieved/ done before February 29 2020.
Write a letter to yourself telling him/her what you want your life to be like in 4 years from now. Or anything along those lines.
Tell your students you will be keeping this essay and making a poster out of it. When 2020 is here, you can have a look at the post again. You could also put the essays in a bottle and keep it somewhere in your class. You can also take a class photo and add it on the poster/ bottle.
Time Capsule
Turn this into a more creative class activity by making a February 29th time capsule. Tell your students to put things in this box and that future students will open it on February 29 2020. They can find newspaper clippings, they can make lists of popular songs/ games/ movies. Anything. They make the time capsule and it is stored somewhere in the class.
So, sorry if this messes up your Monday plans, but I think it would be fun to do something different on a day that is here every four years!!
Do you have any other ideas? The comments section is all yours. Don’t forget to subscribe to my blog or follow me somewhere somehow on the different types of social media shared on my sidebar.

 Will I try this again? Yes. My students really enjoyed it and I found it very helpful. have you done something similar? let me know in the comments below.